|
Charge Code The Charge Code library allows the user to enter specific visit and supply types and their associated insurance Bill Rates, employee Pay Rates (optional), and Revenue Codes. View the Revenue & HCPCS FAQ for more detailed instructions on charge revenue code setup.
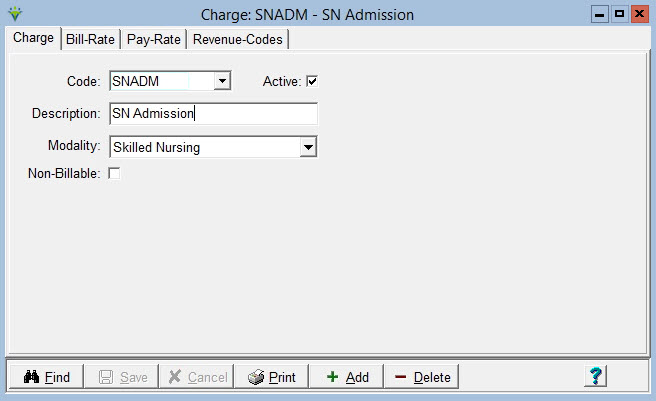
To add a charge code: Click on the ‘Add’ button. Code: Enter a user-defined code. (Note: this must match the code from your clinical software if applicable) Description: Enter a description for the visit or supply Modality: Select a modality from the dropdown. (Modalities are set up in File>File Maintenance>System Settings). Used for claim purposes and report grouping. Non-Billable:
Only check this if the charge is NEVER needed on any claim. If the
charge needs to appear as either Covered or Non-Covered on a claim this
must remain un-checked.
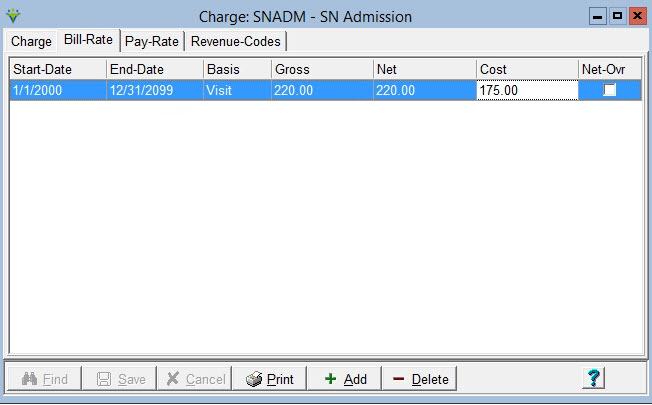
Add a new bill rate:
Click on the ‘Add’ button. Start-Date: Date the bill rate is effective End-Date: Date bill rate ends (Note: only needs to be entered if bill rate has changed) Basis: Select Visit if the visit is billed a flat rate amount or Time if the visit is billed based on time. Supplies are entered with Visit basis. Gross/Net: Enter the agency's usual and customary bill rate for this time period. Enter the flat rate amount if the Basis is set to Visit or the Hourly rate if the Basis is set to Time. Gross and Net will always be the same amount. Bill rates can be overridden at the Insurance, Patient or individual service level if needed. Cost: Estimated cost for this visit. This is a manual calculation based on an average of employees’ earnings plus overhead. Optional but if entered will be used for costing amounts on the PPS Margin and PPS Costing Assistant reports. If none found, cost amounts from System Settings will be used.
Net-Ovr: Net Override is used in conjunction with the charge price
override in Charge Entry. When checked and a user enters a charge
price override in Charge Entry this will ignore the Basis when it is
set to ‘Time’. In addition, if checked the charge amount on the Charge
Detail Report will multiply the price overide amount by the number of
units instead of only showing the price override amount. If
claims are set to pull Gross Amount, supplies will pull the Charge
Price Override as the gross rather than the gross from the Bill-Rate
tab.
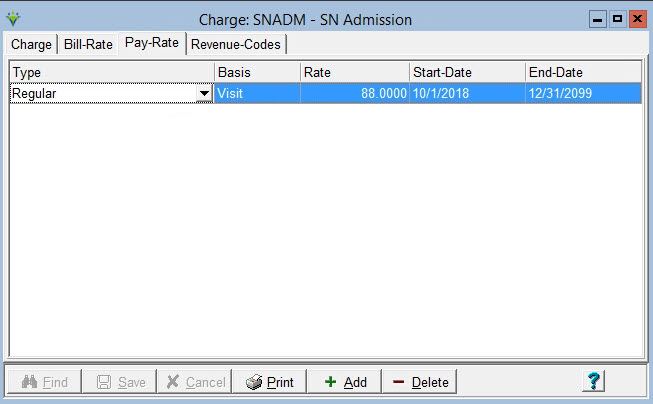
Add a new pay rate: *Note: The Pay Rates are rarely entered in the charge master unless your agency pays every employee the same pay rate for this type of visit.
Add Pay Rate information: Click on the ‘Add’ button. Type: Select Pay Rate. (Pay Rates are setup in the Category master file table under File > File Maintenance) Basis: Select Visit or Time based on how the employee is paid for the visit. Rate: This is the per-visit or per-hour rate. Start-Date: Date the pay rate is effective. End-Date: Date the pay rate ends.
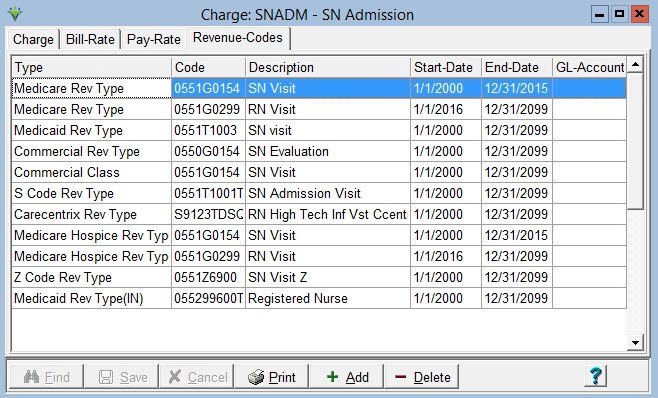
Add a new revenue/HCPCS code:Multiple revenue types can be entered and are tied back to the insurance master file table so that when this charge is billed for a specific insurance the billing application will use the revenue codes appropriate for that insurance. View the Revenue & HCPCS FAQ for more detailed instructions. Click on the ‘Add’ button. In the ‘Type’ dropdown, select an Insurance Revenue type. In the ‘Code’ field, enter the revenue and HCPCS code for the selected insurance revenue type. The 'Description' field will prefill based on the Code selection made, or alternately you can select by the Description and backfill the Code field accordingly. Enter the Start and End-Dates for which this set of codes is in effect for the Insurance Type. GL-Account – Optional. If set up this will be used to sort the Billing Ledger Report by GL account number and is used when exporting GL transactions to a third party GL application.
|


