|
OASIS Import OASIS Import provides the ability to import CMS OASIS Final Validation Report CSV files from iQIES or to import OASIS assessments that have been entered through other vendors (ex. HQS). To switch between the Validation Import and OASIS Import functions, use the Click on Clinical > OASIS Import. Importing the CMS OASIS Final Validation Report csv files:
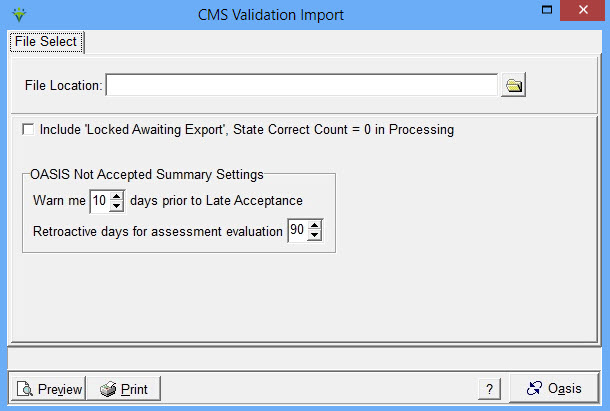
Include
'Locked Awaiting Export', state Correct Count = 0 in Processing: Select
this option to include records that do not have an increment count and
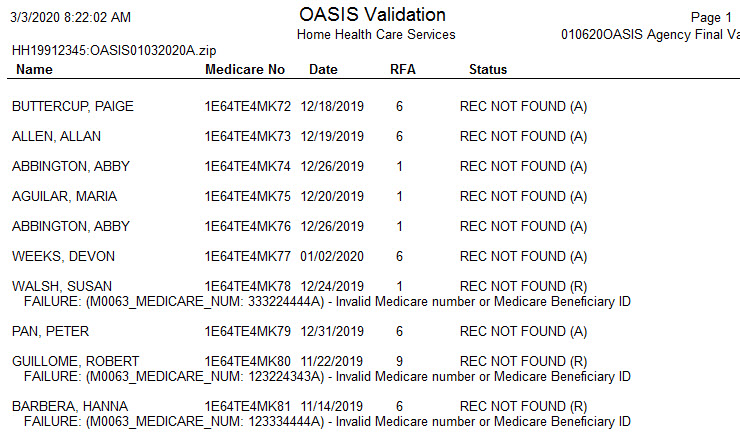
the assessment is in Locked status (not Exported). Rarely used. Warn me __days prior to Late Acceptance: Enter number of days our from today to be used for acceptance date tracking in the Billing Pre-Audit Oasis Not Accepted Summary. Retroactive Days to Check for Expired Visits: Enter the number of days to go back and identify non-accepted assessments in the Billing Pre-Audit Oasis Not Accepted Summary. Click 'Preview' and then select 'Yes' at the prompt. Once the report has been Previewed/Printed, the 'Post' button is enabled. The report will list each assessment record with one of the following statuses: Accepted: The OASIS status will change from "Exported' to "Accepted by CMS" once posted. Rejected: The reason for rejection will be included on the report and the status will change from 'Exported' to "Rejected by CMS". Not Found: This status indicates the OASIS record is not present in the myUnity Essentials database. Status Invalid: This status indicates the OASIS record is in Locked instead of Exported/Accepted/Rejected Status and therefore the validation record being returned may be for a record that has since been edited. Sample Validation Report:
Importing the Oasis Assessment export files: Click on Clinical > OASIS Import To switch between the Validation Import and OASIS Import functions, use the
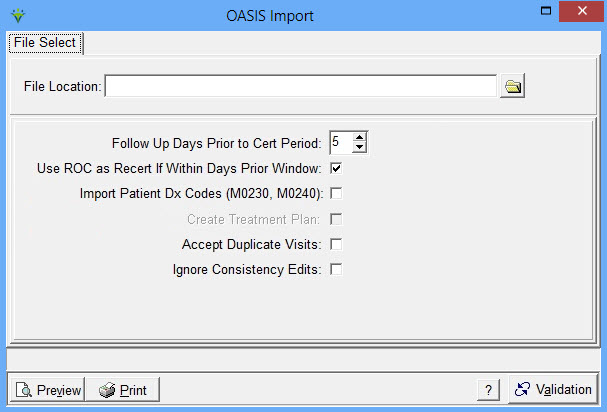
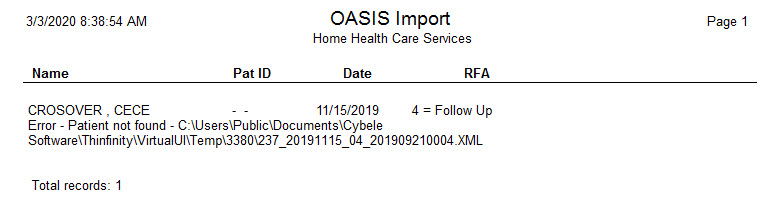
File Location: Browse to the folder containing the (unzipped) OASIS assessments to be imported. Select the first XML record and click "Open". Note: Although only selecting one record, all records within that folder will import. Once previewed or printed, the Post button will be enabled. Follow Up Days Prior to Cert Period: Enter the number of Days prior to cert period start date that the recert Assessment Date can be. CMS requires a 5 day window. Use ROC as Recert If Within Days Prior Window: Select to use a Resumption of Care assessment as the recert (Follow-Up) assessment if within the Days specified above. Import Patient Dx Codes: Select to update the patient file with the diagnosis codes from the Oasis assessments. Create Treatment Plan: Select to allow the OASIS import to create the Certification Period and corresponding 485 Plan of Care with the OASIS information. Accept Duplicate Visits: Select to allow assessments to import that are already on file. Ignore Consistency Edits: Select to import regardless of inconsistency (ex. ROC w/no Transfer on File) Set Status to Awaiting Export: Select to import the assessments with the Status of "Locked - Awaiting Export" instead of the standard "Exported" Status. Sample Import Report:
|
 and
and  toggle buttons in the lower right corner of the window.