Unit
The Unit library setup to match between Clinical Agencies and the Billing Module. Contact Netsmart Support at https://netsmartcares.force.com for assistance adding new Units. Units may designate a line of business or office location. Reports and the billing process can be run using Unit selection.
Patients are assigned to units in the Clinical Patient Profile via the Agency dropdown and can be viewed in the Billing Module in the Patient file Admit tab.
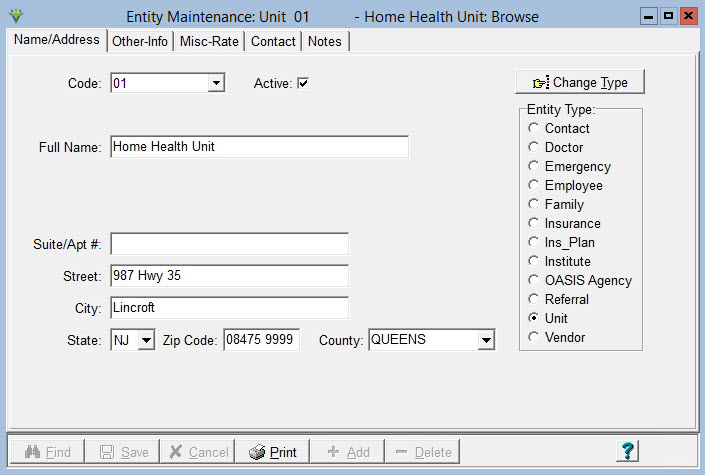
Go to File > File Maintenance > Entity press Change Type and set the radio button to Unit.

To Maintain Unit information:
Code: the Code must be setup to match between Clinical & Billing.
Full Name/Address info: enter the Unit name and address information as is on file with third party entities (i.e. CMS, CAHPS vendors. etc). Claims can be configured to pull Provider name and address information based on the patient Unit.
County: enter the County needed for billing NY Medicaid EPS (if not billing NY EPS, leave blank).
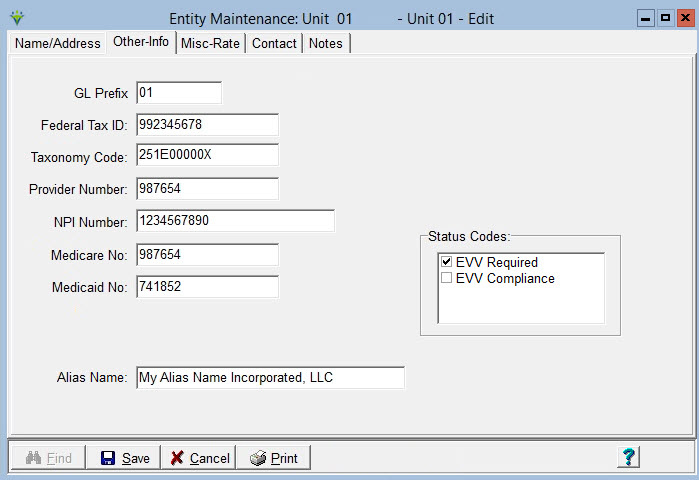
Other-Info Tab
GL Prefix: Enter the GL prefix number to pull to Billing Ledger report for this unit (optional). If used, obtain the GL Prefix from your Accounting Dept.
Federal Tax ID: Enter the unit's Federal Tax ID which can be configured to pull to claims via Option Set setup.
Taxonomy Code: Enter the unit's Taxonomy Code which can be configured to pull to claims via Option Set setup.
Provider Number: Enter the unit's Provider ID which can be configured to pull to CAHPS exports or claims via Option Set setup.
NPI: Enter the unit's National Provider Identification which can be configured to pull to CAHPS exports or claims via Option Set setup.
Medicare No: Enter the unit's Medicare Number which can be configured to pull to claims via Option Set setup.
Medicaid No: Enter the Unit's Medicaid Number which can be configured to pull to claims via Option Set setup.
Alias Name: Enter a name to pull to Electronic Claim output if different from the one on the Name/Address tab (optional). Option Sets must be configured to pull this name if needed.
Status Codes:
EVV Required: check this box if visits for any payer in this Unit need to be sent to MCG+ for Electronic Visit Verification.
EVV Compliance: (reserved for future use).

Rates/Dates Tab
Defaults to Rates Type. Select Close-Periods to view Close Period information.
Press the Add button to add a new row.
Rate-Type: select from one of the hard-coded options below.
Cost-Adjust: Enter a Cost-Adjustment rate type if this unit's cost amount is different than the agency's base costs entered in File > File Maintenance > System Settings. Used for costing reports such as PPS Margin.
VBP-Adjust: Enter the Unit's Medicare Home Health Value-Based Purchasing Model amount furnished by CMS. If you do not enter the VBP amount here, you will need to adjust the AR balances manually via Payment entry.
Homecare-NQ/Hospice-NQ: Used to specify when this Unit will be paid non-quality vs. quality rates by Medicare due to not submitting Quality Data. Rate field should be left blank. Start Date is required. End Date can be entered if one is known.
Mileage-Rate: Used to enter the federal mileage reimbursement amount. Works in conjunction with MILEAGE charge code. Audit will show the prorated amount as Quantity x Mileage-Rate in the Insurance column. The Gross amount will pull from the MILEAGE charge code Bill-Rate tab.
Rate: Enter the rate amount.
Cost-Adjust example: if this Unit's cost is 2% less than the base costs entered in System Settings enter 0.980000. If it is 2% higher, enter 1.020000.
VBP-Adjust example: if the rate is - 0.921% the rate should be entered as 0.99079 (this value is 1.00 - 0.00921). If the rate is positive 0.921% the rate should be entered as 1.00921.
Homecare-NQ/Hospie-NQ: leave the rate field blank as only effective dates are tracked here. The system calculates the 2% difference automatically.
Start-Date: Enter the effective Start date for the rate. (VBP rates should be entered for a calendar year).
End-Dates: Enter the effective End date for the rate.
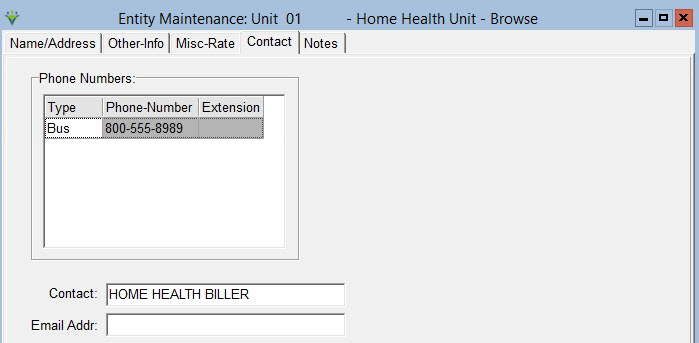
Contact Tab
Enter the Unit's phone number, Contact name (can be used for claims Billing Signature if configured in the claim Option Set) and email address. Optional.

Notes tab
Enter any notes associated with the vendor record.